Accessing Output#
Note
This documentation is incomplete and rapidly evolving as new features are developed. If you find anything out of date or unclear - please let us know!
Once a production has completed and been marked ready, the output will be stored at CERN on LHCb EOS.
Currently the easiest way to access production output directly is by using XRootD. There are various methods available to access the XRootD PFNs:
A web application that allows viewing the status of analysis productions, test pipelines, and sample metadata. It also allows modification of the produced sample metadata, via meaningful tags and assignment of publication numbers. Data management functions are additionally provided to enable a more efficient, fair use of LHCb’s storage.
A client python package,
apd, that allows querying the information available analysis productions and retrieving the physical file names (PFN) of the ntuples produced.
The web application#
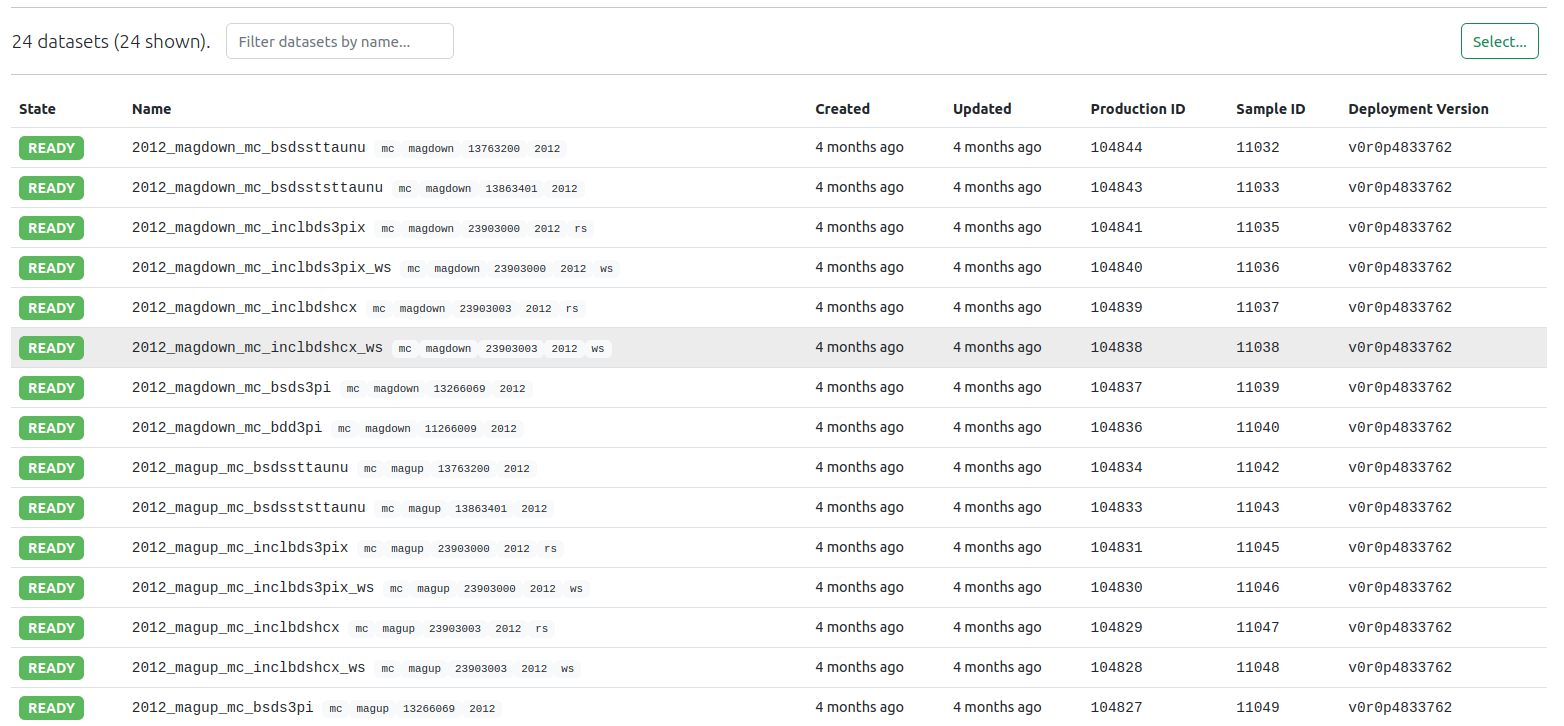
All available productions and datasets produced by Analysis Productions system, grouped by analysis, are available on the LHCb Analysis Productions website. It is possible to view the samples as a list, with their state:

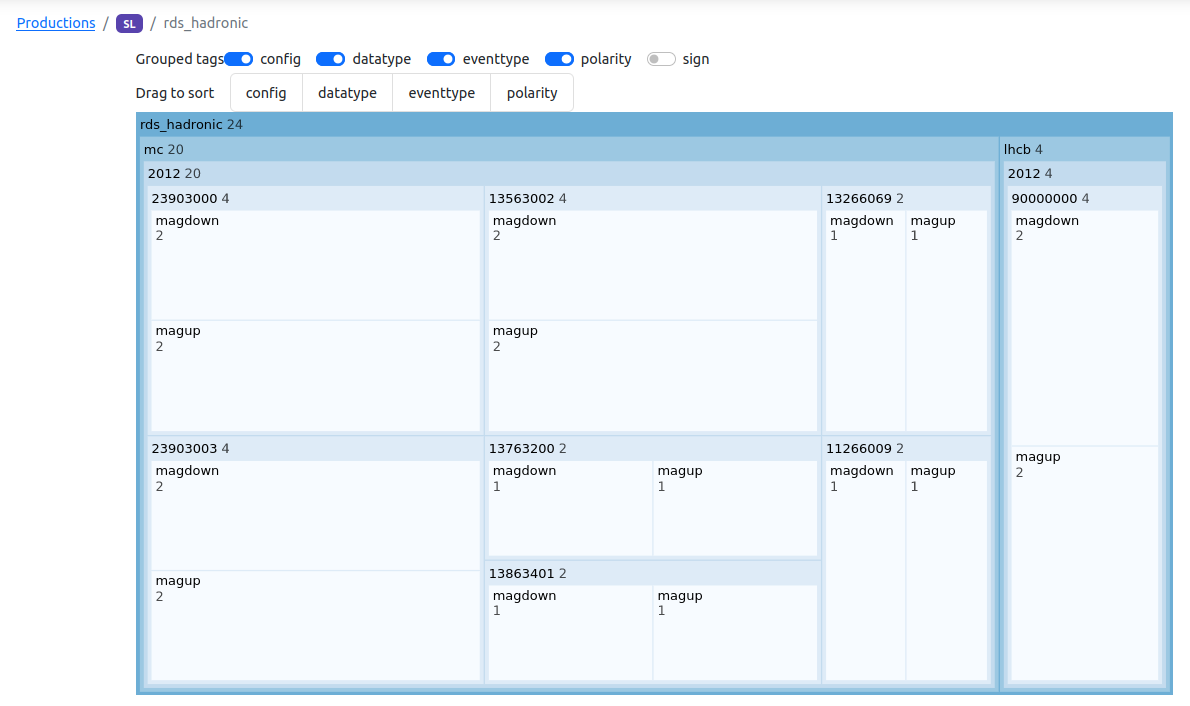
Or to have a tree-view that shows the number of samples after grouping per tag:

The apd python package#
The apd python package is a programmatic interface to the Analysis Productions
database, that allows retrieving information about the samples produced. It queries a
REST endpoint provided by the Web application, and caches the data locally.
Authentication#
As the access to the LHCb data is restricted, one must first login to get a token that will give access to the REST endpoint:
$ apd-login
CERN SINGLE SIGN-ON

On your tablet, phone or computer, go to:
https://auth.cern.ch/auth/realms/cern/device
and enter the following code:
CODE-CODE

You may also open the following link directly and follow the instructions:
https://auth.cern.ch/auth/realms/cern/device?user_code=CODE-CODE

Waiting for login...
Login successful as xxxxx
After using a browser to access the CERN SSO, an access token has been granted to the session.
Finding PFNs#
$ python
>>> import apd
>>> datasets = apd.get_analysis_data("sl", "rds_hadronic", polarity=["magdown", "magup"])
>>> paths = datasets(eventtype=13563002, datatype=2012, sign="rs")
>>> paths
['root://eoslhcb.cern.ch//eos/lhcb/grid/prod/lhcb/MC/2012/BSDSTAUNU.ROOT/00173031/0000/00173031_00000001_1.bsdstaunu.root', 'root://eoslhcb.cern.ch//eos/lhcb/grid/prod/lhcb/MC/2012/BSDSTAUNU.ROOT/00173023/0000/00173023_00000001_1.bsdstaunu.root']
>>> rdf = ROOT.RDataFrame("SignalTuple/DecayTree", paths)
The list of paths obtained can then for example be used to create a ROOT.RDataFrame to analyze the data
N.B. To avoid analysis running twice on the same file, processed in different ways, apd raises an exception if the combination of tags matches several samples:
ValueError: Error loading data: 2 problem(s) found
{'eventtype': '13563002', 'datatype': '2012', 'polarity': 'magdown'}: 2 samples for the same configuration found, this is ambiguous:
    {'config': 'mc', 'polarity': 'magdown', 'eventtype': '13563002', 'datatype': '2012', 'sign': 'rs', 'version': 'v0r0p4882558', 'name': '2012_magdown_mc_bsdstaunu', 'state': 'ready'}
    {'config': 'mc', 'polarity': 'magdown', 'eventtype': '13563002', 'datatype': '2012', 'sign': 'ws', 'version': 'v0r0p4882558', 'name': '2012_magdown_mc_bsdstaunu_ws', 'state': 'ready'}
Snakemake integration#
apd allows querying the analysis productions database for PFns, but it also provides an interface easy to integrate in Snakemake workflows. The following code illustrates a simple workflow to gather data from different samples:
# Import the apd tools, vcersions customized for Snakemake
from apd.snakemake import get_analysis_data, remote

# Get the APD dataset for my analysis
dataset = get_analysis_data("sl", "rds_hadronic")

# Parameters for the datasets tp be analyzed
SHARED_AREA = "root://eoslhcb.cern.ch//eos/lhcb/user/l/lben/test"
CONFIG = "mc"
DATATYPE = "2012",
EVENTTYPE = ["13266069", "11266009"]
POLARITY = [ "magdown", "magup" ]

# main rule for this workflow, which requires building the file bmass.root
# in EOS. This uses the XRootD API to query information about the
# remote files, hence the need to wrap the path (str) with the remote method
# which returns a Snakemake XRootD remote
rule all:
    input:
        remote(f"{SHARED_AREA}/bmass.root")

# templated rule to produce a ROOT file with the histogram for B_M in a
# specific sample, notice that:
#  - the input uses the dataset object and specifies the wildcards to use
#  - the output is local in this case, we could temp() if we want them cleared
#     after completion of the workflow
#
rule create_histo:
    input:
        data=lambda w: dataset(datatype=w.datatype, eventtype=w.eventtype, polarity=w.polarity)
    output: f"bmass_{{config}}_{{datatype}}_{{eventtype}}_{{polarity}}.root"
    run:
        # Embedded script, for demo only, not a good idea in general
        import ROOT
        inputfiles =  [ f for f in input ]
        print(f"==== Reading {inputfiles}")
        f = ROOT.TFile.Open(output[0], "RECREATE")
        rdf = ROOT.RDataFrame("SignalTuple/DecayTree", input)
        hname = f"B_M_{wildcards.config}_{wildcards.datatype}_{wildcards.eventtype}_{wildcards.polarity}"
        h = rdf.Histo1D((hname, hname, 200, 0., 25e3), "B_M")
        h.Write()
        f.Close()
        print(f"==== Created {output[0]}")

# Rule to gather the files produced by create_histo
# - the Snakemake expand() method can be used to create all the combimnations
#   of all parameters
# - the remote() method is needed to have the final created remotely via the XRootD
#   interface. Notice that in this case we request a token to WRITE the file
#   by specifying "rw=True"
rule gather:
        input:
            expand("bmass_{config}_{datatype}_{eventtype}_{polarity}.root",
                    config=CONFIG, datatype=DATATYPE,
                    eventtype=EVENTTYPE,
                    polarity=POLARITY)
        output:
            remote(f"{SHARED_AREA}/bmass.root", rw=True)
        shell:
            "hadd {output} {input}"
- N.B.
the
AnalysisDataobject returned by the snakemake interface returns XRootD remotes for the files, to make the integration easier.When creating remote files, it is necessary to get a XRootD remote with the appropriate credentials (specify
rw=Truefor the output). This is needed when using EOS tokens.
Gitlab CI integration#
Accessing data on EOS requires credentials to do so, typically these credentials are provided in the form of Grid certificates and proxies (lhcb-proxy-init) or Kerberos (kinit). In GitLab CI, to workaround the need to embed long-lived tickets or grid proxies in CI variables, it is possible to use EOS tokens instead for data access, using the apd package.
Gitlab CI jobs can be configured with the necessary credentials, by adding the following to your .gitlab-ci.yml:
default:
  id_tokens:
    LBAP_CI_JOB_JWT:  # generates a JWT and assigns it to the env var $LBAP_CI_JOB_JWT
      aud: https://lbap.app.cern.ch
  before_script:
    - source /cvmfs/lhcb.cern.ch/lib/LbEnv
    - eval "$(apd-login)"  # authenticate with Analysis Productions using this JWT
The JSON Web Token (JWT) is generated by GitLab, and set inside the CI job in an environment variable LBAP_CI_JOB_JWT. The before_script: configurations use this JWT to authenticate to our API, which issues an EOS token in return.
When running apd inside a job with this environment variable set, the EOS tokens are made available and issued under the identity of person who triggered the CI job. As these tokens grant access to files on EOS under your identity, any user triggering a CI workflow will need to authorise the
repository and paths that can be accessed on the following link:
https://lhcb-analysis-productions.web.cern.ch/settings/
To actually use these EOS tokens to access files, you’ll need to import apd directly and use the apd.auth function to add them correctly to each PFN, like this:
import apd
import uproot
analysis_data = apd.AnalysisData("charm", "my_very_charming_analysis")
pfns = [
  {apd.auth(pfn): "MyWonderfulDecays/DecayTree"}
  for pfn in analysis_data(name="2016_magup", version="vXX")
]

df = uproot.concatenate(pfns, library="pd")

print(
  f"The mean of my Superb particle mass distribution is {np.mean(df.SuperbParticle_MASS)}"
)
The apd.auth function can be called to wrap a XRootD file URL with a read-only
token, and apd.authw with a read-write token, should you need it (access needs to be specifically granted at the above
link).
The apd.snakemake interface automatically wraps the input and output files with the appropriate tokens.
Access LHCb data from GitLab CI within Gaudi#
apd can be used to access LHCb data that is stored at CERN from within GitLab CI jobs.
To do this you must give Gaudi one or more LFNs as input data and provide the pool_xml_catalog.xml file that maps the LFN to a PFN.
This works both locally and on GitLab CI.
When running locally your kerberos credentials or grid proxy will be used as normal.
When running in GitLab CI you can use apd to inject short lived access tokens into the pool_xml_catalog.xml file.
This can be set up as follows:
Locally generate a
pool_xml_catalog.xmlfile and commit it to your repository$ lb-dirac dirac-bookkeeping-genXMLCatalog -l /lhcb/MC/Dev/DIGI/00205444/0000/00205444_00000231_1.digi
Adjust the
input_filesoption of your job to be the LFN and setxml_file_catalog, i.e.input_files: - - root://eoslhcb.cern.ch//eos/lhcb/grid/prod/lhcb/MC/Dev/DIGI/00205444/0000/00205444_00000231_1.digi + - LFN:/lhcb/MC/Dev/DIGI/00205444/0000/00205444_00000231_1.digi +xml_file_catalog: pool_xml_catalog.xml
Adjust your
gitlab-ci.ymlfile to inject the tokens after sourcingLbEnv.id_tokens: LBAP_CI_JOB_JWT: aud: https://lbap.app.cern.ch before_script: - source /cvmfs/lhcb.cern.ch/lib/LbEnv - eval "$(apd-login)" + - apd-add-tokens-pool-xml pool_xml_catalog.xml
Downloading ntuples locally#
The apd-cache-files allows downloading a dataset, or part of it to the local machine.
It takes similar options as other apd commands and uses xrdcp to download the data.
e.g.
apd-cache-files sl rds_hadronic --name=2012_magdown_mc_bsds3pi --data_cache_dir=/tmp/apdcache
If the environment variable APD_DATA_CACHE_DIR is specified, pointing to the cache directory, all calls to apd will return PFNs pointing to the local files instead of the versions in EOS:
APD_DATA_CACHE_DIR=/tmp/lben/apdcache apd-list-pfns sl rds_hadronic --name=2012_magdown_mc_bsds3pi/tmp//apdcache/eos/lhcb/grid/prod/lhcb/MC/2012/BSDS3PI.ROOT/00172470/0000/00172470_00000001_1.bsds3pi.root